Introduction
Are you looking to streamline your WordPress development process? Learning how to install WordPress locally with Local WP can significantly boost your productivity and make website creation a breeze. In this comprehensive guide, we’ll walk you through the process of setting up a local WordPress environment using Local WP, a powerful and free tool for developers.
What is Local WP?
Local WP is a free, user-friendly application that allows you to create and manage WordPress sites on your local machine. Developed by Flywheel, Local WP simplifies the process of setting up a local WordPress development environment, eliminating the need for complex server configurations.
Key features of Local WP include:
- Easy one-click WordPress installation
- Support for multiple local sites
- Built-in SSL certificate generation
- PHP version switching
- Local domain name creation
Installing Local WP
To install WordPress locally with Local WP, you first need to download and install the application. Local WP is available for macOS, Windows, and Linux operating systems.
System Requirements:
- macOS Catalina 10.15 or higher
- Windows 10 or higher
- Most modern Linux distributions
Installation Steps:
- Visit the releases page and download the latest release for your specific operating system.
- Once downloaded, run the installer:
- Launch Local WP after installation.
Creating Your First Local WordPress Site
Now that you’ve installed Local WP, let’s create your first local WordPress site:
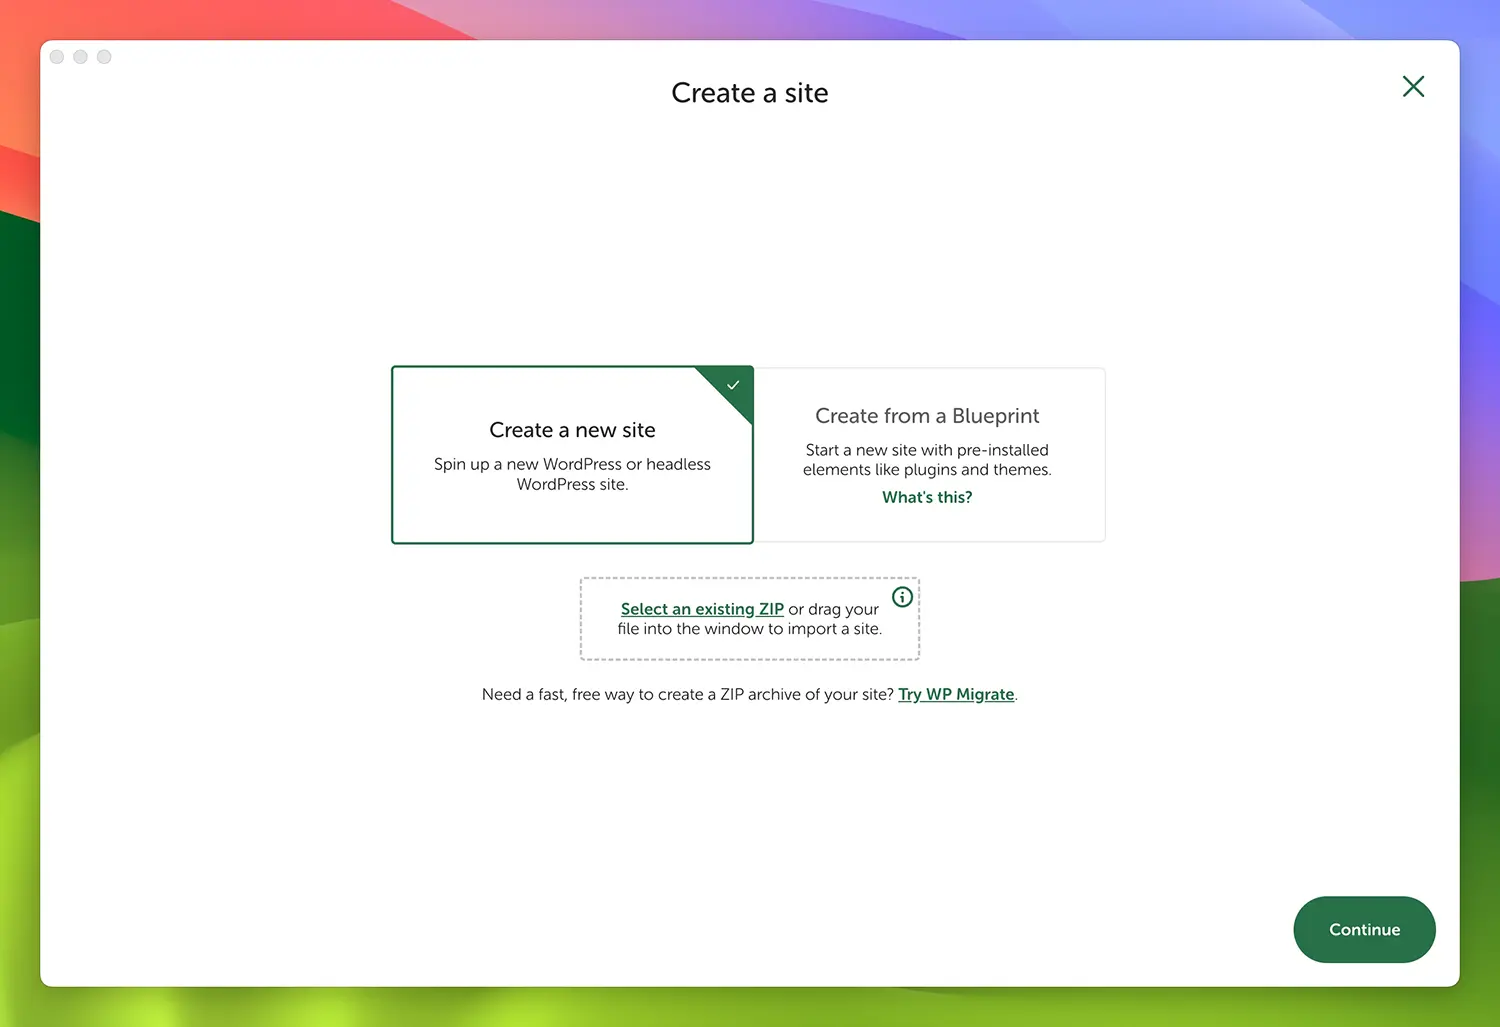
- Open Local WP and click on the “+” button to add a new site.
- Choose “Create a new site” and give your site a name.
- Select your preferred environment (e.g., Preferred, Custom).
- Choose your WordPress username and password.
- Click “Add Site” to create your local WordPress installation.
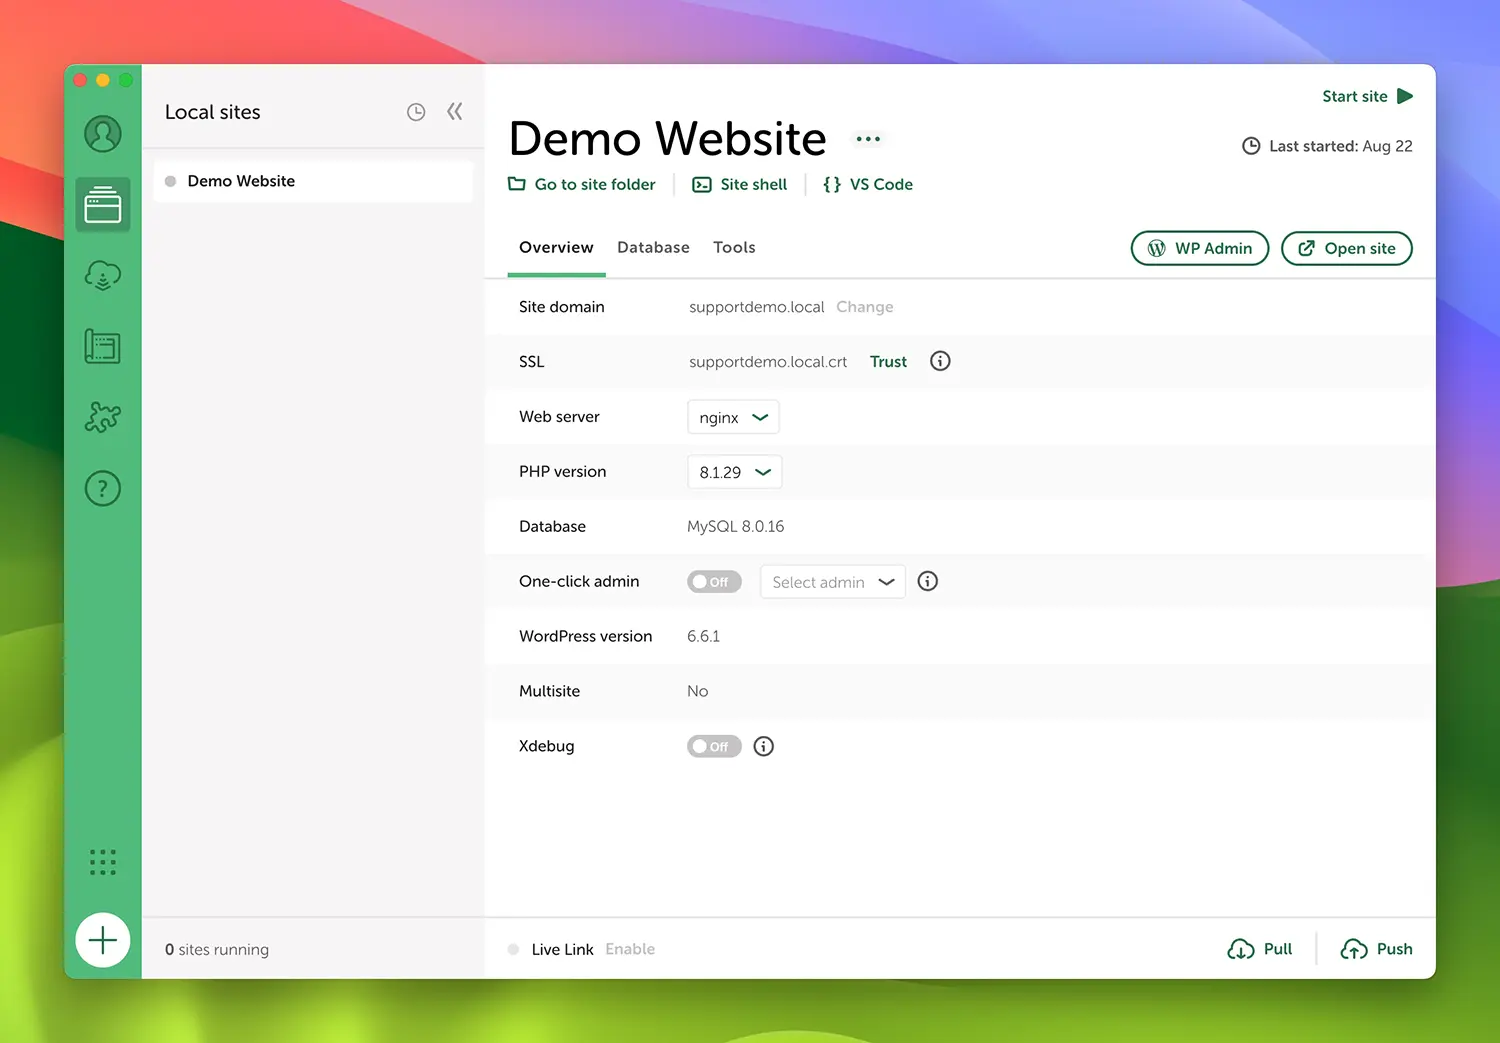
Local WP will now set up your WordPress site, including the database and server configuration.
Developing WordPress Websites Locally
With your local WordPress site set up, you can start developing:
- Access your site’s WordPress dashboard by clicking “WP Admin” in Local WP.
- Install themes and plugins directly from the WordPress dashboard.
- Edit your theme files using your preferred code editor.
- Local WP automatically updates your site as you make changes.
Essential Free Features of Local WP
Local WP offers several free features that make WordPress development easier:
- Custom Domains: Each site gets a
.localdomain for easy access. - SSL Certificates: Local WP generates SSL certificates for secure local development.
- PHP Version Switching: Easily switch between PHP versions to test compatibility.
- Availability of add-ons to enhance the development process.
Best Practices for Local WordPress Development
To make the most of your local development environment:
- Use Version Control: Integrate Git into your workflow for better code management.
- Regular Backups: Use Local WP’s backup feature to safeguard your work.
- Keep Local WP Updated: Regularly update the application for the best performance and security.
Troubleshooting Common Issues
If you encounter issues while using Local WP:
- Check the Local WP community forums for solutions.
- Ensure your system meets the minimum requirements.
- Try restarting the site or Local WP application.
Moving from Local to Live (Using Free Methods)

When you’re ready to go live with your site:
- Use a free migration plugin like All-in-One WP Migration (free version), or WPvivid (free version).
- Export your site from the local environment.
- Import the exported file to your live server.
- Update your URLs and test thoroughly after migration.
Conclusion
Learning how to install WordPress locally with Local WP can significantly improve your development workflow. It provides a safe environment to experiment, develop, and test your WordPress sites before going live. With its user-friendly interface and powerful features, Local WP is an excellent choice for both beginners and experienced developers.
Our WordPress Development Services
At 6 Degrees, we develop high-quality WordPress websites for our clients. Our team of experts can help you with:
- Custom WordPress theme development
- Plugin customization
- Website performance optimization
- Security enhancements
- Migration and launch support
Ready to take your WordPress development to the next level? Contact us today for a free consultation and let’s discuss how we can help you achieve your web development goals.